Meet Stacy: Your Expert AI Assistant
Click to view larger image
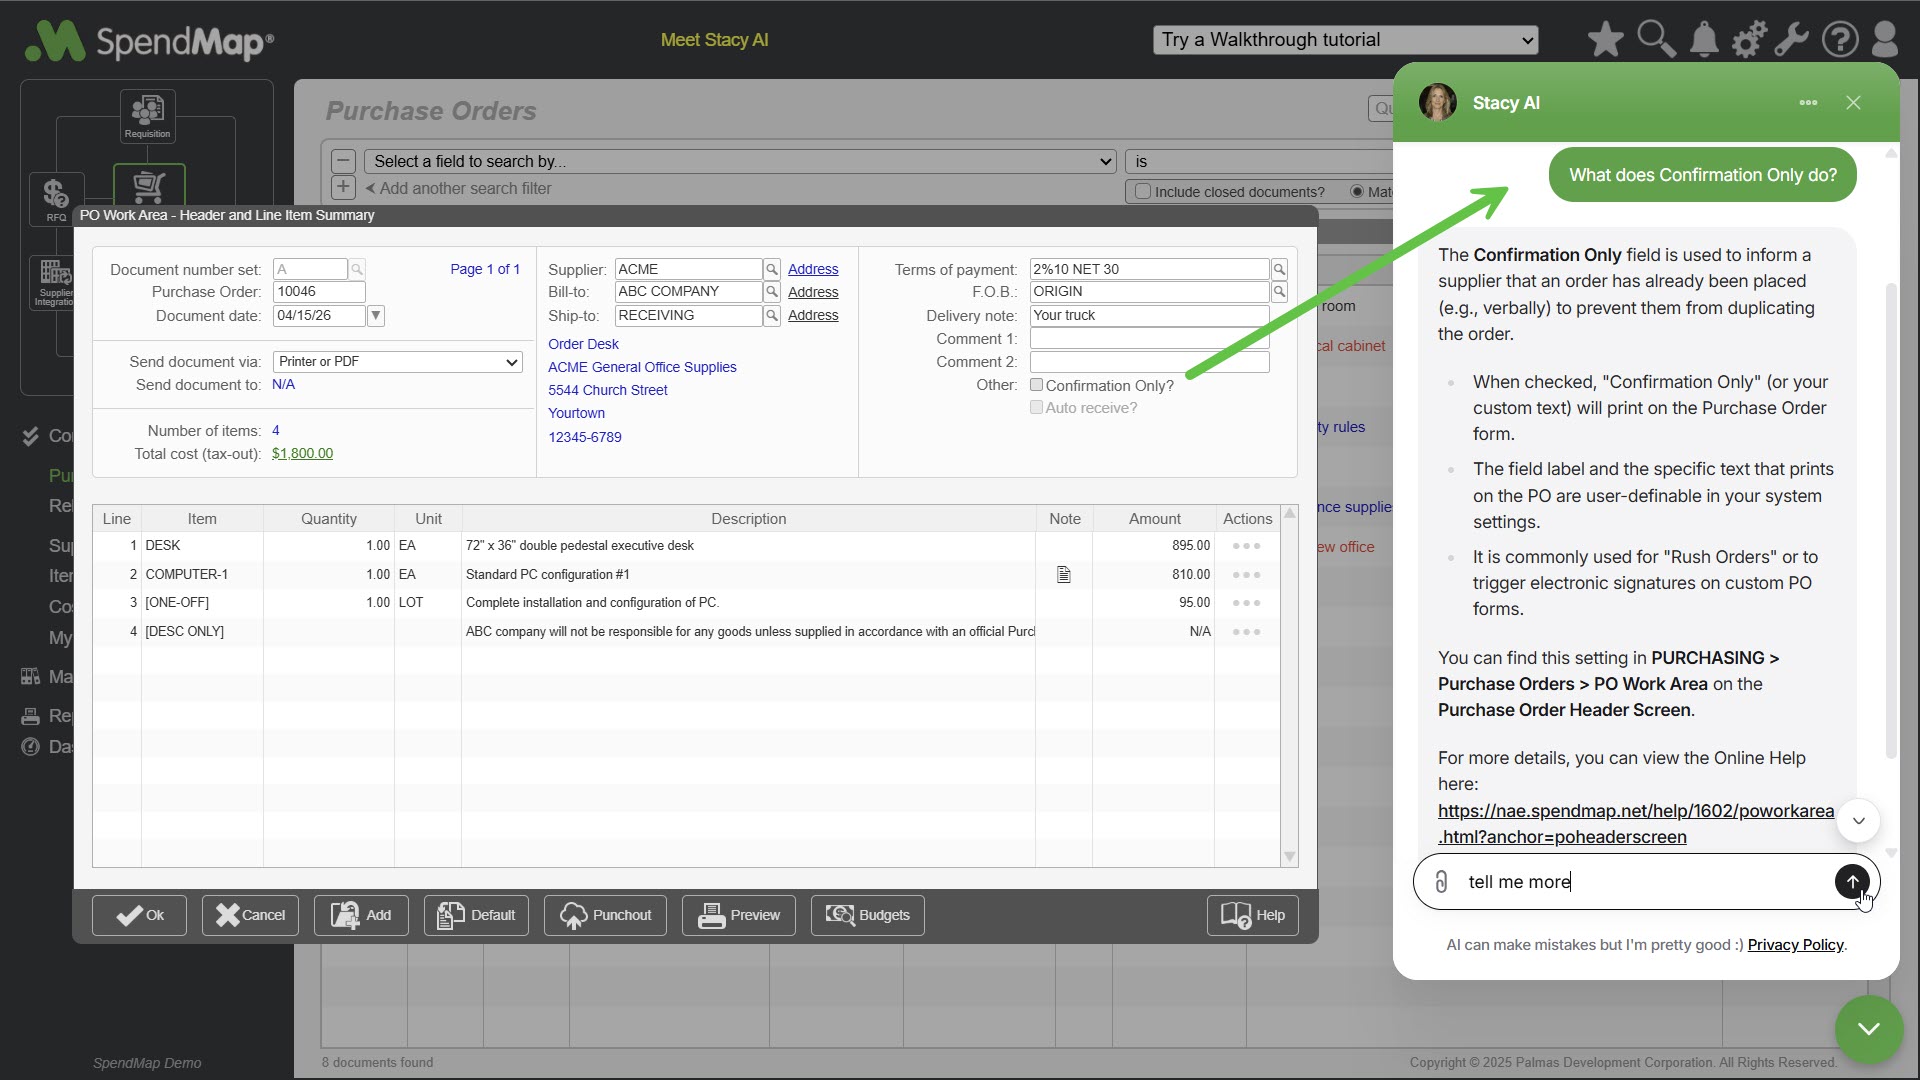
Hi, I'm Stacy. I've mastered over 1,000 pages of SpendMap knowledge and purchasing best practices so you don’t have to. Think of me as a helpful co-pilot on your SpendMap journey.
Skip the Search: Don't dig through help files or FAQs. You can ask me things like, "How do I set up my approval workflow?" or "Tell me about budget tracking?", for exact menu paths and instructions.
Context Sensitive Assistance: No need to waste time explaining what you're doing in SpendMap or what screen you're on; just ask me about what you're doing in the system, like "What does this do?", or "Which fields can I rename on this screen?".
While our human team is the heart of SpendMap, I’m here when you need an answer right now. I'll keep you moving forward with instant, expert support between meetings or calls.
– Stacy
PS. I don't have access to data/transactions in your system. I'm a guide to help you implement SpendMap in your business, and I know a few shortcuts ;)
AI-Powered Invoice Approval

Watch AI Invoice Approval Video
SpendMap's AI-Powered, No-Touch Invoice Approval feature can match supplier invoices to approved Purchase Orders for you automatically.
Suppliers can email their invoices directly into SpendMap, and if an invoice matches the corresponding PO and receipts within your defined tolerances, the payment can be approved automatically, with any discrepancies flagged for review.
This feature is an optional add-on to the existing Invoice Approval Module - you can choose to use AI invoice matching for specific suppliers or invoices, while continuing to process other invoices manually in your Invoice Work Area.
Reorder Stock Utility
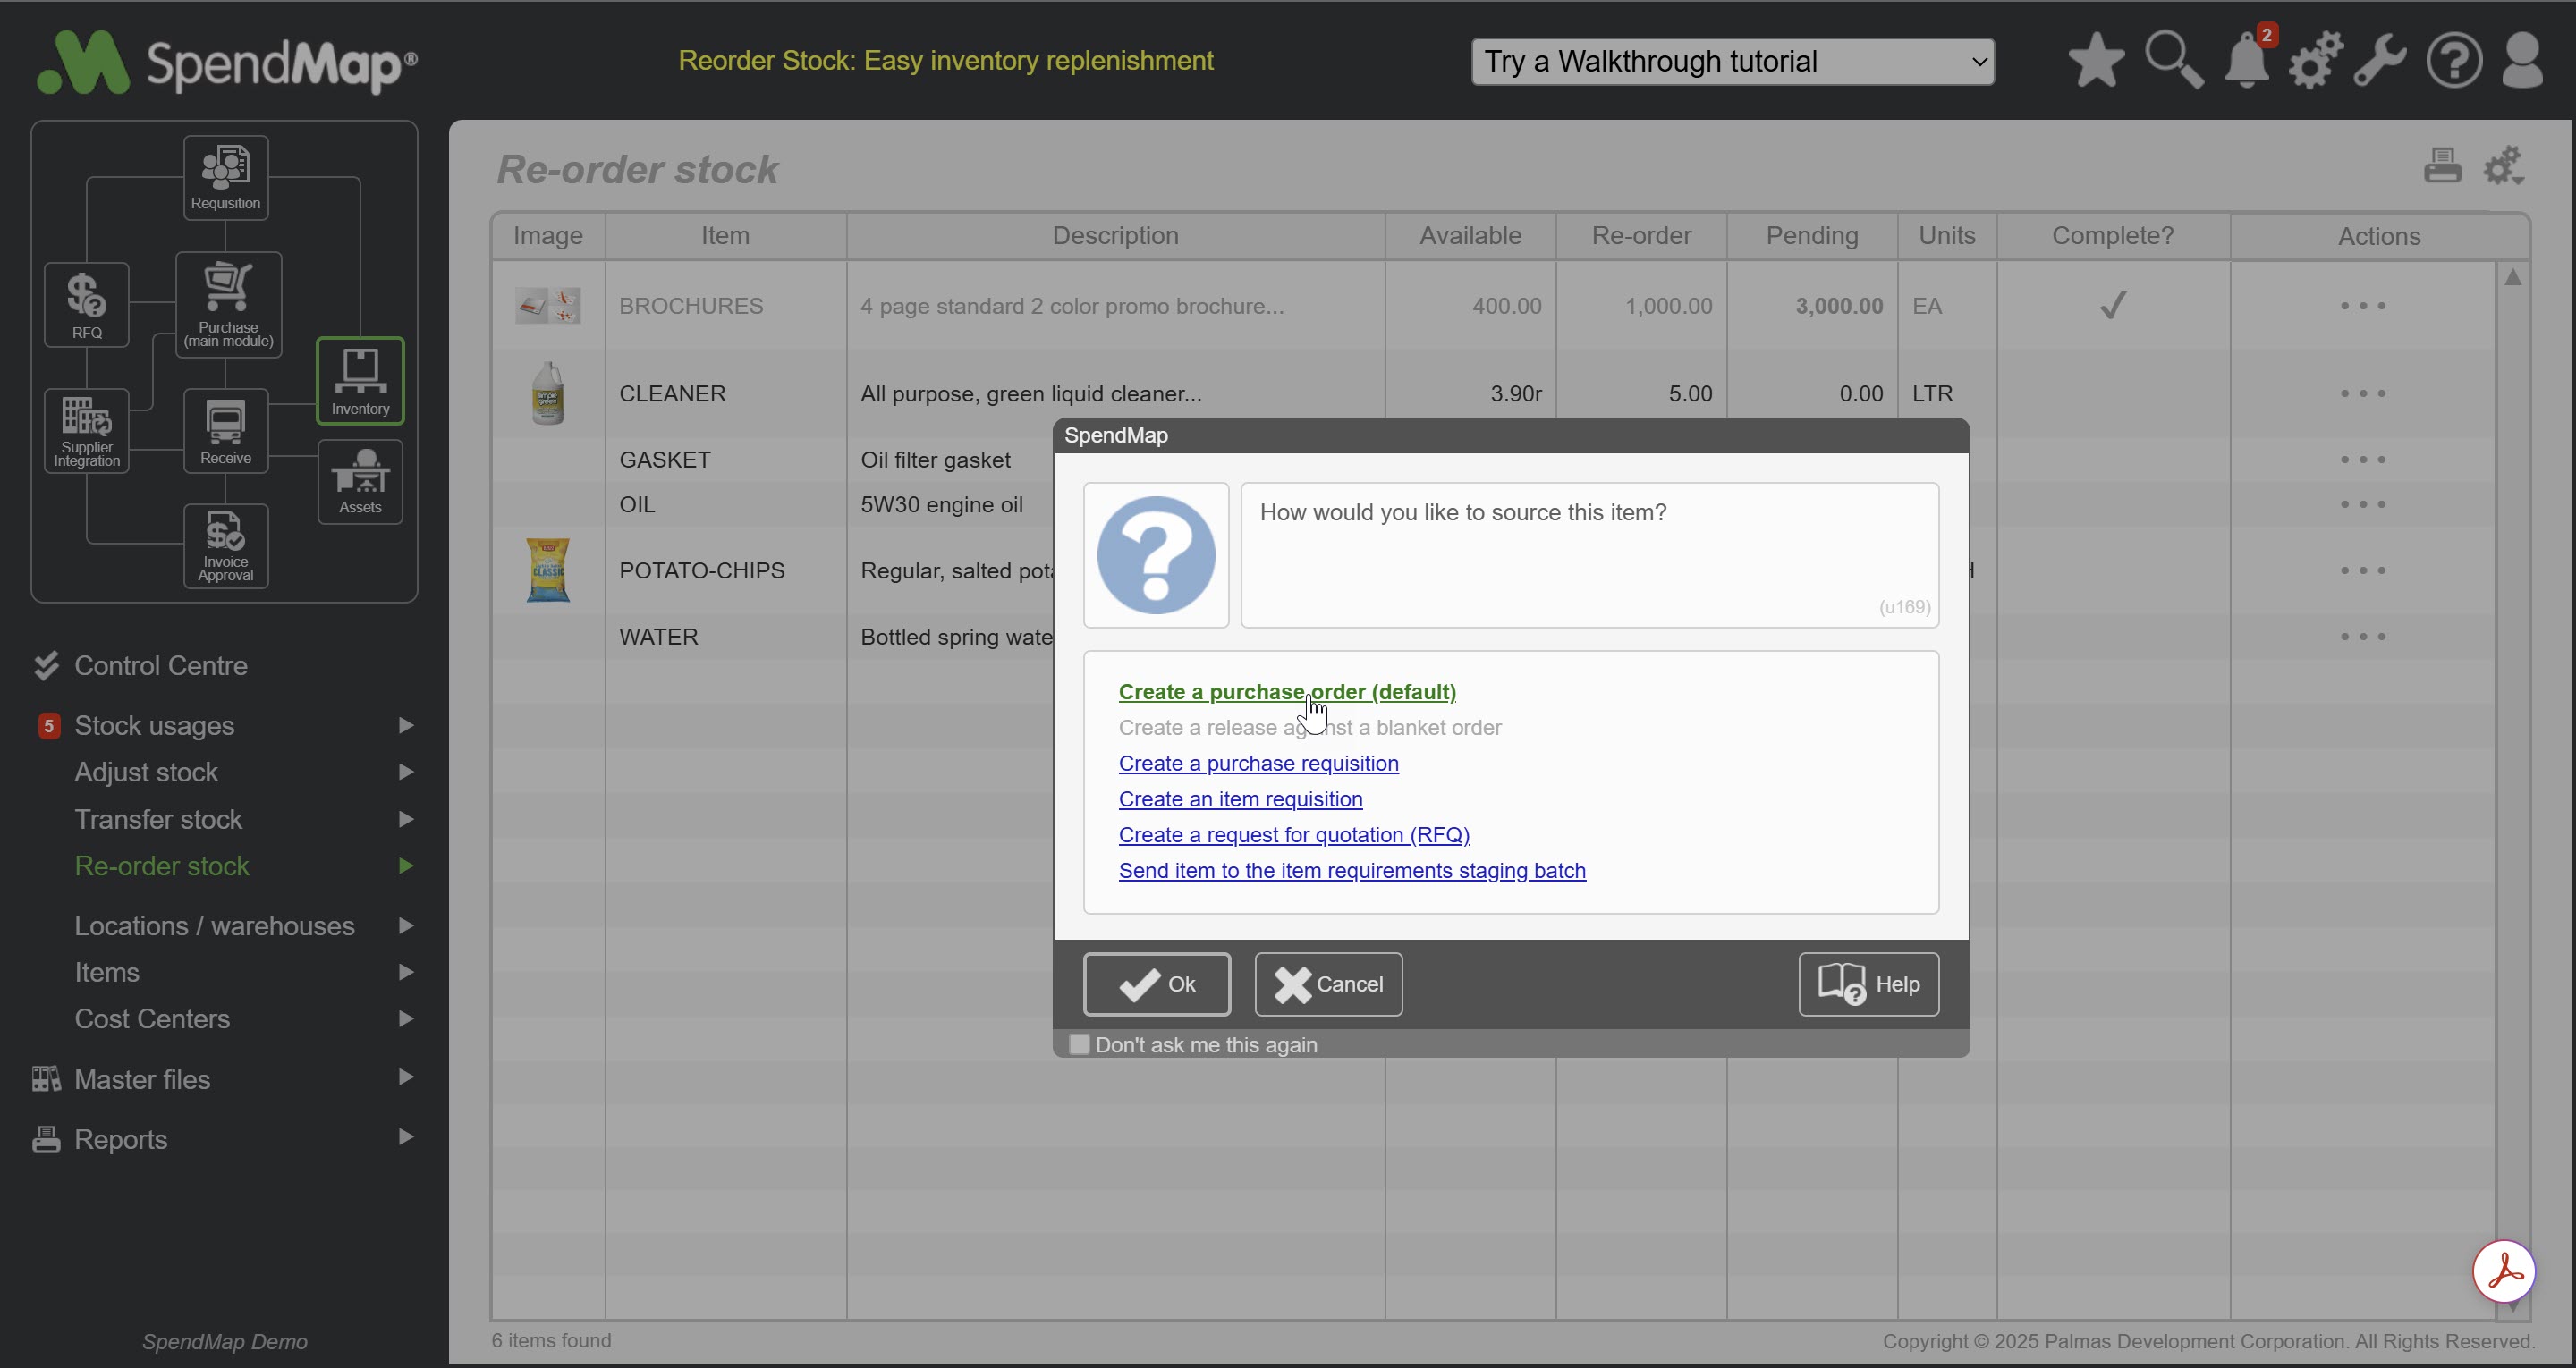
The new Reorder Stock Utility makes it even easier to replenish inventory for items whose in-stock balances have fallen below their reorder levels.
You can create Purchase Orders or Requisitions in seconds to order more stock, with a few clicks of the mouse.
Bonus: We've added a new "top-up" feature, to default the purchase quantity on new orders, to bring your inventory back up to the Maximum.
Click to view larger image
Sorting and Filtering Reports
The Report Wizard has been improved to allow multiple sort orders per report, as well as advanced filters based on one or many fields simultaneously.
Application Programming Interface (API)
We have introduced a new API to complement SpendMap's existing integration and reporting tools.
To ensure we meet your specific requirements, we are initially offering custom APIs based on customer needs and feedback. Future releases of SpendMap will include a library of pre-built APIs for common transactions and data elements.
If you would like us to develop a custom API for your workflow, please contact SpendMap Client Services.
Welcome to SpendMap v16
SpendMap has been redesigned to help you get your work done faster, with fewer steps, fewer clicks, and easier access to the information that you need to manage and control your company's spending.
New Main Menu Brings what's Important into Focus
We've completely overhauled the Main Menu to give you faster and easier access to the information and tools that you use most often.
We think you'll fall in love with the new "theme", but if you miss the Main Menu from the previous version, you can switch to the Classic Theme using the menu in the User Profile section, at the top-right of the Main Menu.
Your Purchase Orders and Other Documents, Front-and-Center
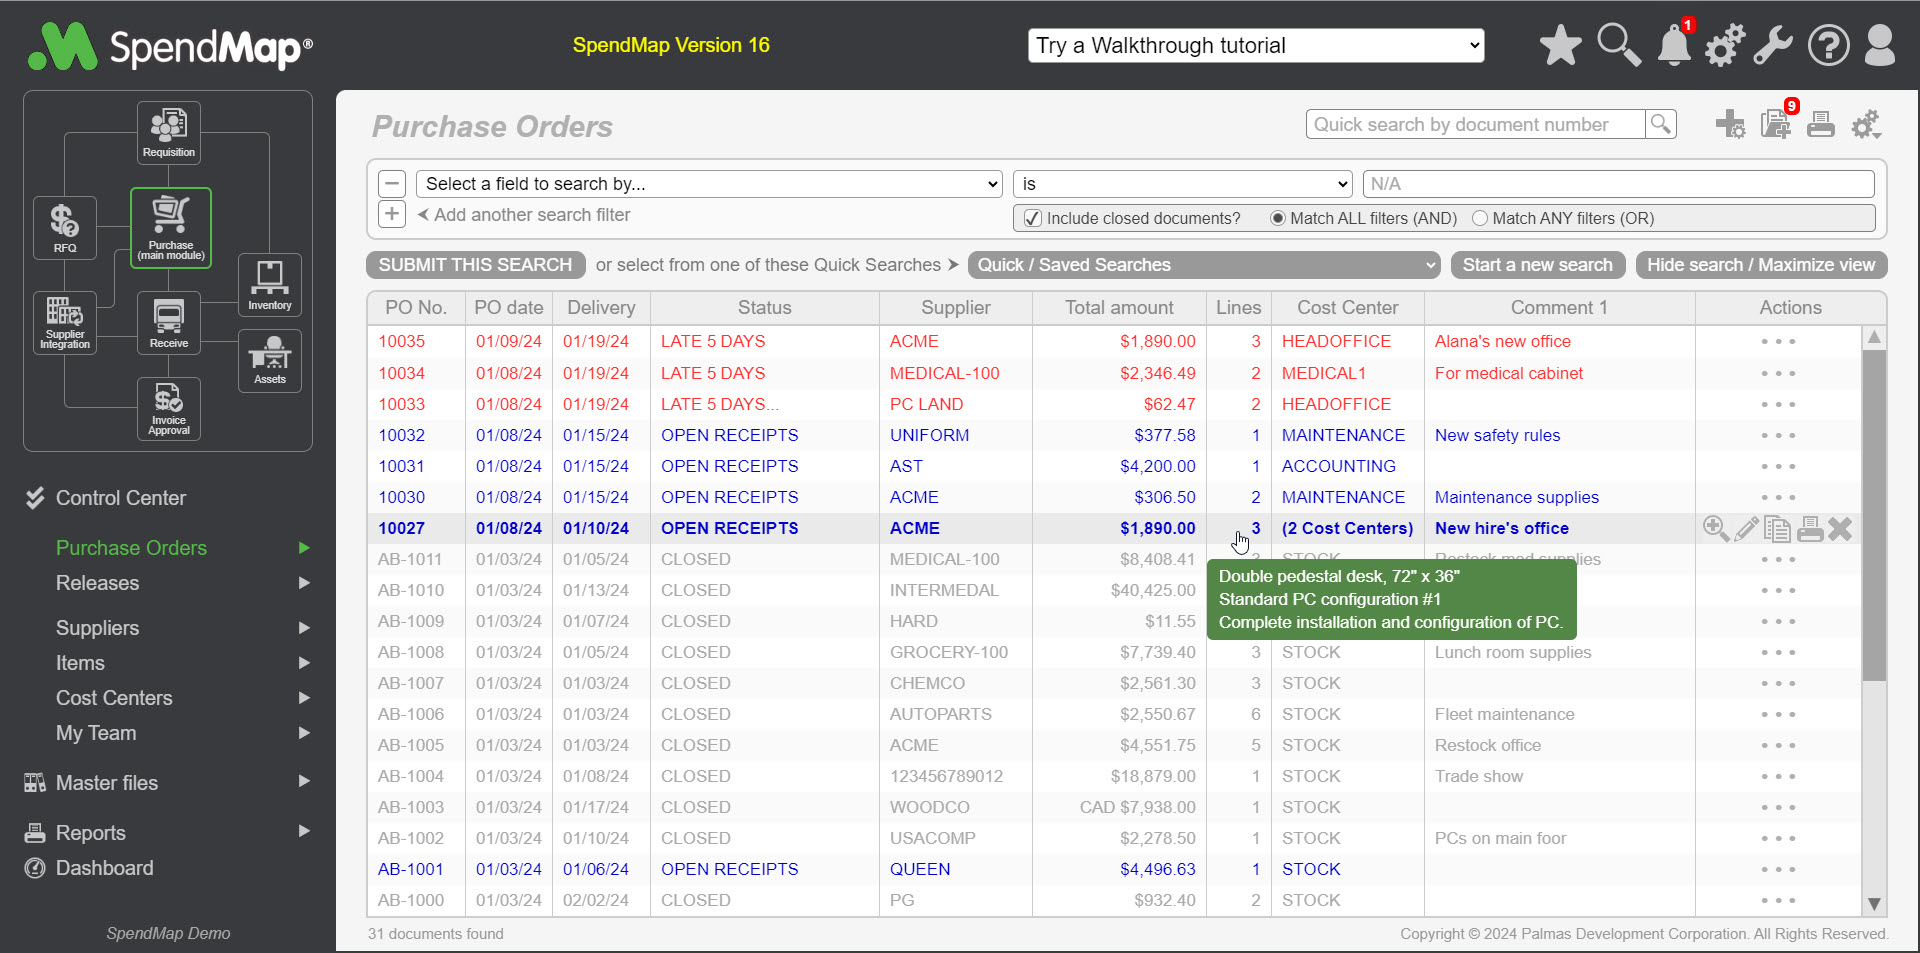
You will now see your recent Purchase Orders, Requisitions and other documents and transactions directly in the Main Menu, so there's no need to make a separate trip to the View Status Utility to review your open/processed orders.
As soon as you create a new PO or other document, it will show at the top of the list in the Main Menu...
Click to view larger image
One-Click to your Favorite Documents and Master Files
The most popular documents/transactions in each module, as well as the most popular Master Files, are available in the Left Navigation Bar of the Main Menu...
As always, the full list of documents and Master Files are available by clicking the ">" icon next to each section.
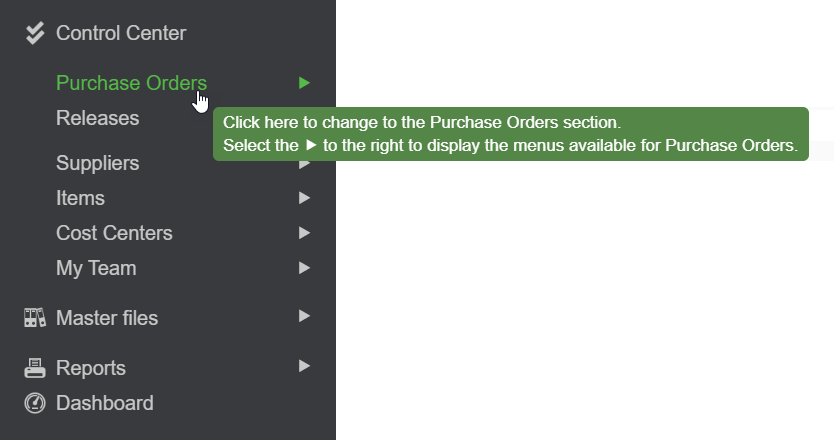
One-Click to Popular Actions
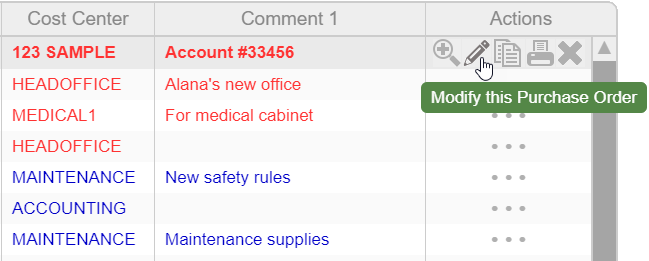
The Actions Toolbar provides instant access to the most commonly-used features for each document in the list, such as the ability to modify, copy, print or delete a document.
Again, for more options, use the “>” menus, to the right of each Section, in the left navigation pane.
Quick Document Processing
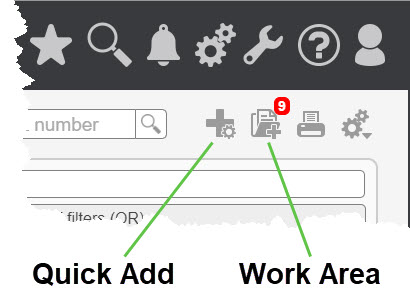
A "quick processing" option is now available for all documents/transactions, allowing you to create new Purchase Orders, Requisitions, RFQs and other documents, without the additional steps and complexity of the respective Work Areas.
Use the "+" icon in the Toolbar at the top of the list, to create a new PO or other document and add it to the list of processed documents, without going in and out of the Work Area, and processing the document as a separate step.
But don't worry, your document Work Areas are still there, which can come in handy when working on many documents at once or when you want to save draft documents and come back to them later...
Meet the new Control Center: your Task List, only Better
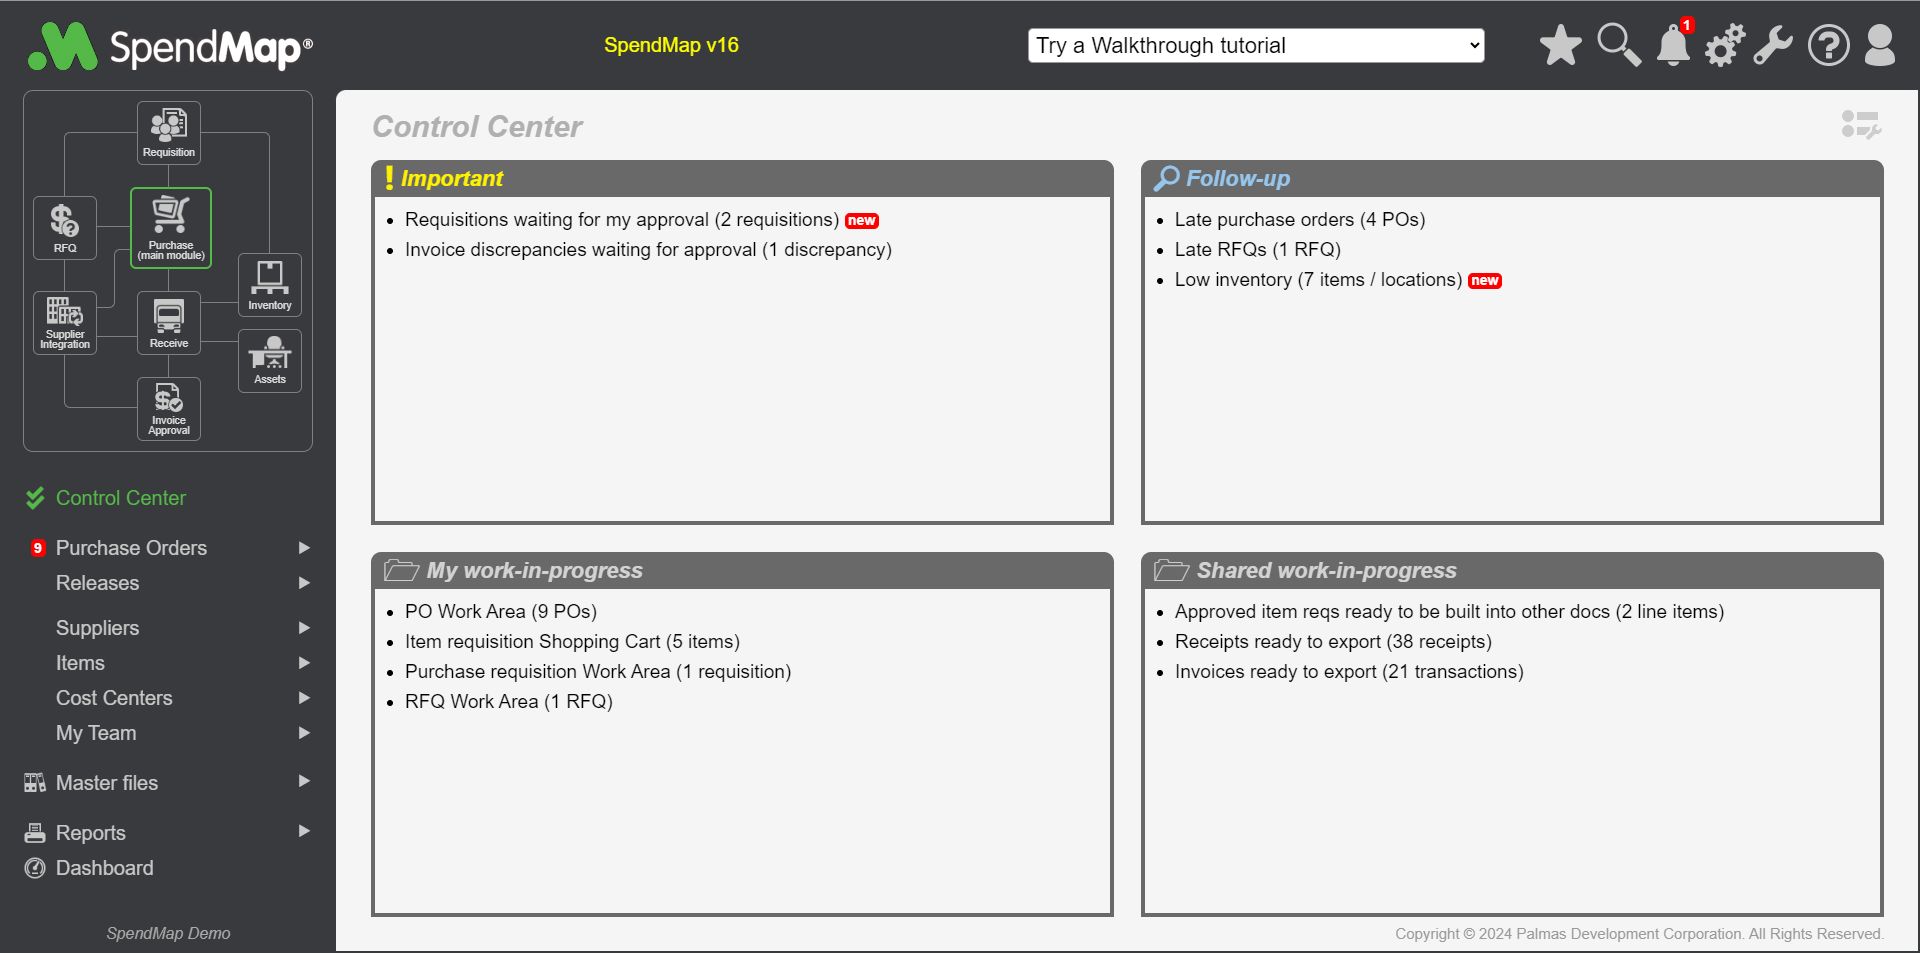
The Control Center brings together all your work throughout SpendMap. Like the Task List in the previous version, this is your “to-do” list for the entire system, in one place.
You will see “Action Items” here when you have work to do. Just click the hyperlinks to go to the applicable area of the system to complete your work or review the related information. Once the Action Item has been addressed and the task is complete, the Action Item will be removed from the list automatically.
TIP: Use the Setup icon  at the top-right of the page to add or remove Action Items from your Control Center.
Click to view larger image